Front Pong
- MoltS Xalats
- Apr 1, 2024
- 7 min de lectura
Aquesta és la tercera de les quatre entregues que hem dissenyat perquè programis des de zero una versió senzilla del joc Pong mitjançant FUSION-C V1.2.
Objectiu
Al passat article vam treballar la pala del jugador i al primer de la serie la pilota de joc. En aquest situarem els dos elements anteriors dins de l’escenari de joc per tal de crear un joc de frontó previ a l’article final que serà el Pong complert.

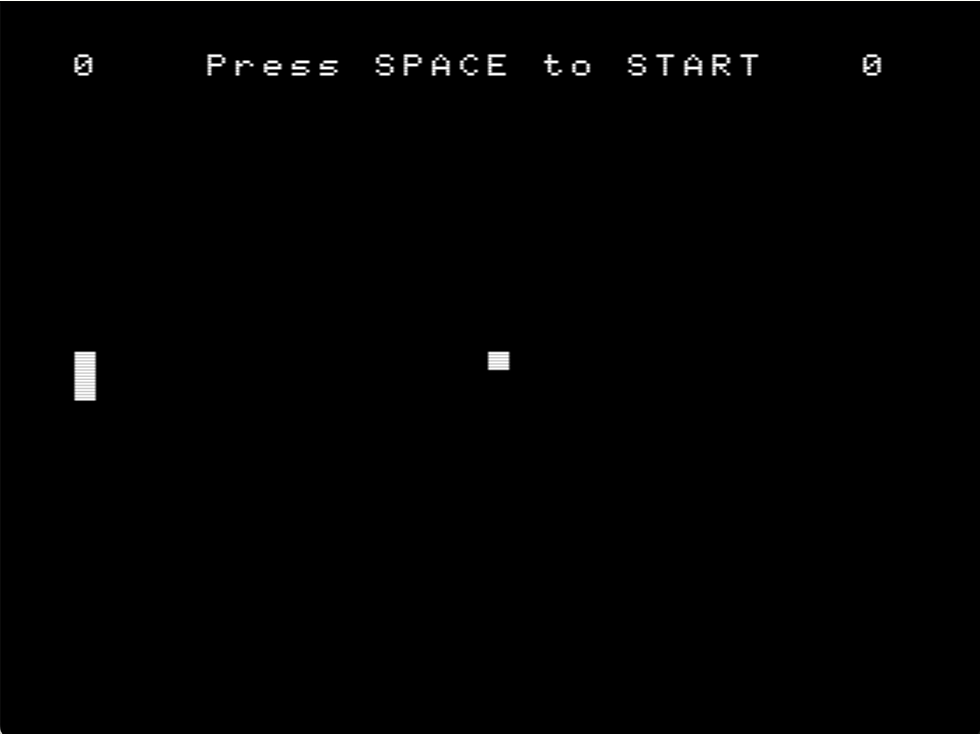
Exemple de la pantalla inicial en que ens trobarem en executar fpong.com
Introducció
En ser el tercer article de la serie ja no presentarem les seccions en que es divideix un fitxer de C i anirem al gra.
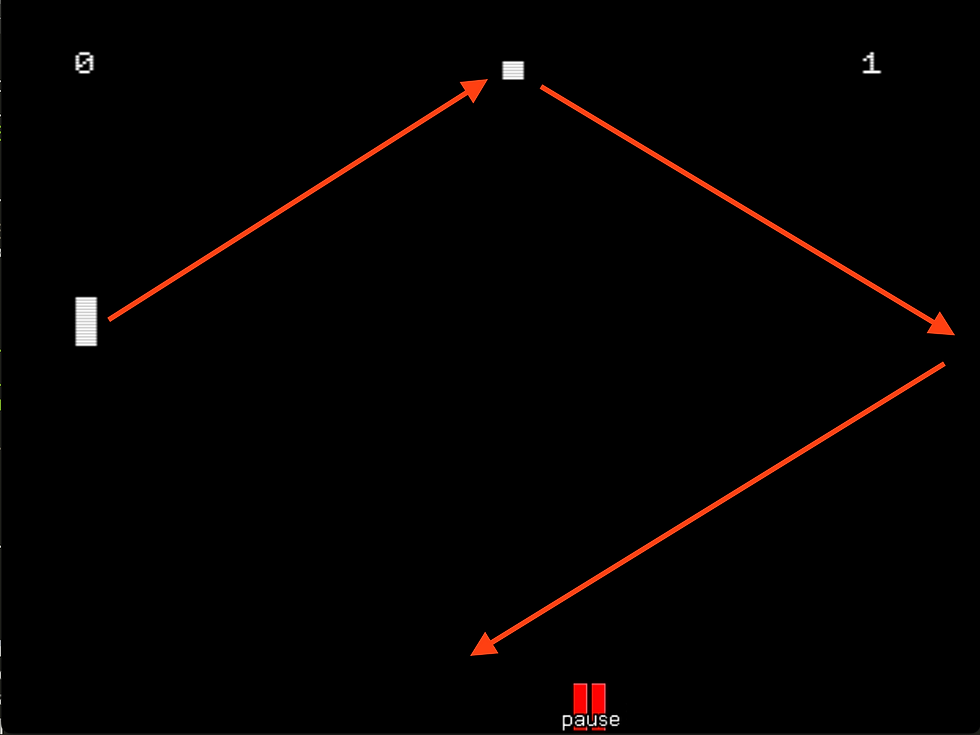
Tal com hem dit el joc que presentem aquí és del tipus frontó. La pilota rebotarà per les parets de la zona de joc, com ja ho feia ja al primer article. Aquí però, traurem el rebot de la paret on està situada la pala del jugador permetent tornar la pilota picant-la amb aquesta.
Si el jugador no toca la pilota i aquesta sobrepassa la pala del jugador la CPU incrementarà en un punt el seu marcador.
Per tant l'objectiu és tocar amb la pala la pilota i tornar-la tants cops com sigui possible.

Figura explicativa dels rebots de la pilota que ha fet contacta amb la pala.
Secció de documentació
//
// fpong.c
// Fusion-C Pong game example articles
// Here we will learn how put the pad and the ball in a game
// MoltSXalats 2024
//
Secció del preprocessador
#include "fusion-c/header/msx_fusion.h"
#include "fusion-c/header/vdp_sprites.h"
#include "fusion-c/header/vdp_graph2.h"
#include <stdlib.h>
Secció de definició de tipus
typedef struct {
char spr; // Sprite ID
    char y; // Y destination of the Sprite
    char x; // X destination of the Sprite
    char pat; // Pattern number to use
    char col; // Color to use (Not usable with MSX2's sprites)
} Sprite;
Secció de definició dels prototipus de les funcions
void DrawSprite(void);
void BallCal(void);
void GameStart(void);
void FT_Wait(int);
Secció de definició de les variables globals
// Direction of the ball
signed char DirX;
signed char DirY;

char PlyScore,CpuScore;

// Definining the Ball and Pad Sprite Structures
Sprite TheBall;
Sprite PlyPad;

const char PatternBall[]={
						0b11100000,
						0b11100000,
						0b11100000,
						0b00000000,
						0b00000000,
						0b00000000,
						0b00000000,
						0b00000000
};

const char PatternPad[]={
						0b11100000,
						0b11100000,
						0b11100000,
						0b11100000,
						0b11100000,
						0b11100000,
						0b11100000,
						0b11100000
};

// Movement direction control by the cursors positions
const signed char moves[9]={0,-1,0,0,0,1,0,0,0};
Destacar aquí que a diferencia dels altres dos articles, definirem i utilitzarem ja dos sprites en pantalla, la pilota i la pala del jugador.
Sprite TheBall;
Sprite PlyPad;
Secció de la funció main i el bucle de joc
void main (void)
{
	char joy;

	SetColors(15,0,0);

	// 256 x 212 pixel
	Screen(5);
	Sprite8();
	SpriteDouble();
	KeySound(0);

	SetSpritePattern(0, PatternBall,8);
	SetSpritePattern(1, PatternPad,8);

	// Defining Variables

	// Player Pad Sprite initialization
	PlyPad.x=10;
	PlyPad.y=100;
	PlyPad.spr=1;
	PlyPad.pat=1;

	PlyScore=0;
	CpuScore=0;

	// Ball Sprite initialization
	TheBall.x=128;
	TheBall.y=100;
	TheBall.spr=0;
	TheBall.pat=0;

	DirX=1;
	DirY=1;

	// IF MSX is Turbo-R Switch CPU to Z80 Mode
	if(ReadMSXtype()==3) {
       ChangeCPU(0);
   	}

	GameStart();

	// Main loop

	while (Inkey()!=27)
	{
		// Reading Joystick 0 (Keyboard)
		joy=JoystickRead(0);

		// Update the Y position of the Player Pad
		PlyPad.y+=moves[joy];
		BallCal();
		DrawSprite();

		FT_Wait(200);
	}

	// Ending program, and return to DOS
	Screen(0);
	KeySound(1);
	Exit(0);
}
Destacar aquí la inicialització del dos sprites que tenim ara en pantalla.
// Player Pad Sprite
PlyPad.x=10;
PlyPad.y=100;
PlyPad.spr=1;
PlyPad.pat=1;

// Ball Sprite
TheBall.x=128;
TheBall.y=100;
TheBall.spr=0;
TheBall.pat=0;
Per primera vegada, en aquest tercer article farem ús de la variable que portarà el compte de la puntuació de la CPU. En aquest cas comptarà les vegades que el jugador no sigui capaç de tornar la pilota.
// IF MSX is Turbo-R Switch CPU to Z80 Mode
if(ReadMSXtype()==3) {
ChangeCPU(0);
}
Si us fixeu hem afegit un control per tal que si s'executés el programa en un MSX Turbo R es canviés la CPU a Z80 ja que amb la R800 no seria jugable.
while (Inkey()!=27)
{
	// Reading Joystick 0 (Keyboard)
	joy=JoystickRead(0);

	// Update the Y position of the Player Pad
	PlyPad.y+=moves[joy];
	BallCal();
	DrawSprite();

	FT_Wait(200);
}
Com podem observar el bucle de joc consta també igual que en el passat article de dues funcions principals: DrawSprite() i FT_Wait().
A DrawSprite() pintarem els sprites així com en controlarem la seva col·lisió. També portarem el control per tal que aquests es mantinguin en tot moment dins el terreny de joc o pantalla.
A FT_Wait() portarem un control de retard en el pintat de pantalla per tal que amb un Z80 tot flueixi a una velocitat controlada. Es pot fer amb EnableInterrupt() i Halt() o amb IsVsync() controlant els estats Vblank, però en tenir problemes amb les col·lisions gestionades pel propi VDP, hem optat per fer un simple contador de passos.
Implementació de les funcions definides per l’usuari
// Print the initial game screen

void GameStart(void)
{
	char Temp[5];

	PutText((256-20*8)/2,4,"Press SPACE to START",0);

	// Initial Positions
	PlyPad.x=10;
	PlyPad.y=100;
	TheBall.x=128;
	TheBall.y=100;

	DirX*=-1;

	DrawSprite();

	Itoa(PlyScore,Temp,10);
	PutText(10,4,Temp,0);

	Itoa(CpuScore,Temp,10);
	PutText(235,4,Temp,0);

	while (!IsSpace(WaitKey()))
	{}

	PutText((256-20*8)/2,4,"                    ",0);
}
Amb aquesta funció inicialitzem la pantalla de joc al principi i cada vegada que la pilota superi la pala del jugador. S'aprofita també per actualitzar el marcador amb les vegades que la CPU ens ha colat la pilota.
// Put all sprite on screen

void DrawSprite(void)
{
	// Collision Detection
	if (SpriteCollision()) {
		DirX*=-1;
	}

	PutSprite(PlyPad.spr,PlyPad.pat,PlyPad.x,PlyPad.y,15);
		 PutSprite(TheBall.spr,TheBall.pat,TheBall.x,TheBall.y,15);

	// Check Ball Outside Game field
	if (TheBall.x<10)
	{
		CpuScore++;
		GameStart();
	}

	// Check PlyPad Outside Game field
	if (PlyPad.y<10)
	{
		PlyPad.y=10;
	}
	if (PlyPad.y>190)
	{
		PlyPad.y=190;
	}
}
La novetat dins aquesta funció que s’encarrega del pintat dels sprites és el control de la col·lisió entre aquests, en el cas que ens pertoca, de la col·lisió entre la pilota i la pala del jugador. Això s’aconsegueix utilitzant la funció SpriteCollision() de la llibreria vdp_sprites.h de FUSION-C. Aquesta funció retorna 1 cas que es detecti una col·lisió entre sptrites. Aprofitem el moment de la detecció per canviar la direcció de la pilota DirX*=-1;
En aquest exemple sols treballarem les col·lisions que ens proporciona el propi VDP. Facilita molt la feina però té alguns problemes: si torna a col·lisionar abans que s’hagi executat el canvi de direcció ens podem trobar en un punt mort, si tinguéssim molts sprites en pantalla tampoc tindríem informació del sprite que hagués col·lisionat.
Per tot l’exposat en acabar el darrer article de la series dedicarem un article només a les col·lisions per caixes.
// Ball Position

void BallCal(void)
{
	TheBall.x+=DirX;
	TheBall.y+=DirY;

	// Douncing the Ball on the Top and Bottom border
	if (TheBall.y>=190 || TheBall.y<5)
		DirY*=-1;

	// Douncing the Ball on the right border
	if (TheBall.x>=245)
		DirX*=-1;
}
En aquesta funció controlarem les coordenades de la posició de la pilota així com que no surti del terreny de joc rebotant a tres de les quatre parets.
// Wait Routine

void FT_Wait(int cicles) {
  unsigned int i;

  for(i=0;i<cicles;i++)
    {}
}
Per últim la funció FT_Wait() que us hem comentat abans que hem variat del dos altres articles, ja que l’enfoc original portava problemes amb les col·lisions gestionades pel VDP.
Tot seguit us deixem el codi sencer i al final un enllaç on podreu executar online l’exemple que hem treballat.
//Documentation section

//
// fpong.c
// Fusion-C Pong game example articles
// Here we will learn how put the pad and the ball in a game
// MoltSXalats 2024
//


// Preprocessor section

#include "fusion-c/header/msx_fusion.h"
#include "fusion-c/header/vdp_sprites.h"
#include "fusion-c/header/vdp_graph2.h"
#include <stdlib.h>


// Definition section of macros and symbolic constants

#define TRUE 1
#define FALSE 0


// Type definition section

typedef struct {
	char spr;	// Sprite ID
    char y;		// Y destination of the Sprite
    char x;		// X destination of the Sprite
    char pat;	// Pattern number to use
    char col;	// Color to use (Not usable with MSX2's sprites)
} Sprite;


// Definition section of function prototypes

void DrawSprite(void);
void BallCal(void);
void GameStart(void);
void FT_Wait(int);


// Definition section of global variables

// Direction of the ball
signed char DirX;
signed char DirY;

char PlyScore,CpuScore;

// Definining the Ball and Pad Sprite Structures
Sprite TheBall;
Sprite PlyPad;

const char PatternBall[]={
						0b11100000,
						0b11100000,
						0b11100000,
						0b00000000,
						0b00000000,
						0b00000000,
						0b00000000,
						0b00000000
};

const char PatternPad[]={
						0b11100000,
						0b11100000,
						0b11100000,
						0b11100000,
						0b11100000,
						0b11100000,
						0b11100000,
						0b11100000
};

// Movement direction control by the cursors positions
const signed char moves[9]={0,-1,0,0,0,1,0,0,0};


// Section of the main function and the game loop

void main (void)
{

	char joy;


	SetColors(15,0,0);

	// 256 x 212 pixel
	Screen(5);
	Sprite8();
	SpriteDouble();
	KeySound(0);

	SetSpritePattern(0, PatternBall,8);
	SetSpritePattern(1, PatternPad,8);

	// Defining Variables

	// Player Pad Sprite initialization
	PlyPad.x=10;
	PlyPad.y=100;
	PlyPad.spr=1;
	PlyPad.pat=1;

	PlyScore=0;
	CpuScore=0;

	// Ball Sprite initialization
	TheBall.x=128;
	TheBall.y=100;
	TheBall.spr=0;
	TheBall.pat=0;

	DirX=1;
	DirY=1;

	// IF MSX is Turbo-R Switch CPU to Z80 Mode
	if(ReadMSXtype()==3) {
       ChangeCPU(0);
   	}

	GameStart();

	// Main loop

	while (Inkey()!=27)
	{
		// Reading Joystick 0 (Keyboard)
		joy=JoystickRead(0);

		// Update the Y position of the Player Pad
		PlyPad.y+=moves[joy];
		BallCal();
		DrawSprite();

		FT_Wait(200);
	}

	// Ending program, and return to DOS
	Screen(0);
	KeySound(1);
	Exit(0);
}


// Print the initial game screen

void GameStart(void)
{
	char Temp[5];

	PutText((256-20*8)/2,4,"Press SPACE to START",0);

	// Initial Positions
	PlyPad.x=10;
	PlyPad.y=100;
	TheBall.x=128;
	TheBall.y=100;

	DirX*=-1;

	DrawSprite();

	Itoa(PlyScore,Temp,10);
	PutText(10,4,Temp,0);

	Itoa(CpuScore,Temp,10);
	PutText(235,4,Temp,0);

	while (!IsSpace(WaitKey()))
	{}

	PutText((256-20*8)/2,4,"                    ",0);
}

// Put all sprite on screen

void DrawSprite(void)
{
		// Collision Detection
		if (SpriteCollision()) {
			DirX*=-1;
		}

		PutSprite(PlyPad.spr,PlyPad.pat,PlyPad.x,PlyPad.y,15);
		PutSprite(TheBall.spr,TheBall.pat,TheBall.x,TheBall.y,15);

		// Check Ball Outside Game field
		if (TheBall.x<10)
		{
			CpuScore++;
			GameStart();
		}

		// Check PlyPad Outside Game field
		if (PlyPad.y<10)
		{
			PlyPad.y=10;
		}
		if (PlyPad.y>190)
		{
			PlyPad.y=190;
		}
}

// Ball Position

void BallCal(void)
{
	TheBall.x+=DirX;
	TheBall.y+=DirY;

	// Douncing the Ball on the Top and Bottom border
	if (TheBall.y>=190 || TheBall.y<5)
		DirY*=-1;

	// Douncing the Ball on the right border
	if (TheBall.x>=245)
		DirX*=-1;
}

// Wait Routine

void FT_Wait(int cicles) {
  unsigned int i;

  for(i=0;i<cicles;i++)
    {}
}
Conclusions
Ja ens falta poc per a tenir la sèrie complerta. En el proper article afegirem la pala de la CPU controlada per aquesta i així completarem la versió del Pong que hem estat treballant amb FUSION-C.
Tal com hem comentat en aquest article en farem un sols destinat a les col·lisions on veurem en un exemple dos dels tipus de col·lisions comparades. Les que proporciona el propi VDP i les de caixa fetes per programari i sobre les que en tindrem un major control.
Clica aquí per a veure l'exemple funcionant.


Comentaris