Understanding Collisions
- Aug 31, 2024
- 7 min read
Objective
As we mentioned in the previous installment of the series of articles on programming a Pong-type game, it's now time to improve collision detection by applying a technique used in the video game world known as collision boxes.
First, we will present a small example that we have adapted from the book Modern MSX BASIC Game Development by Raul Portales, specifically from chapter 5, “Collision detection,” converting it from BASIC to C. Here, we will introduce the technique and compare it with hardware-based collisions. You can find more information about the book at the link [1] at the end of the article.
Finally, we will explain how we modified the code from the previous Pong article (specifically the CPU paddle) to replace the collision management with collision boxes.
Introduction

Screenshot of the collision example we have prepared
The example we propose to help you understand collisions is the one mentioned above. It consists of two C-shaped sprites. This shape was chosen to illustrate the difference between box collisions and sprite collisions, as with sprite collisions, one figure can fit inside another without them actually colliding.
We have also created a couple of indicators at the bottom of the screen to visually represent the collision when it occurs, both in the box mode and the sprite mode, which correspond to software and hardware respectively.
A bit of theory. What are collision boxes?
The idea is to imagine a box around the sprites whose overlap we want to monitor. When the boxes overlap, that's when the sprites collide..
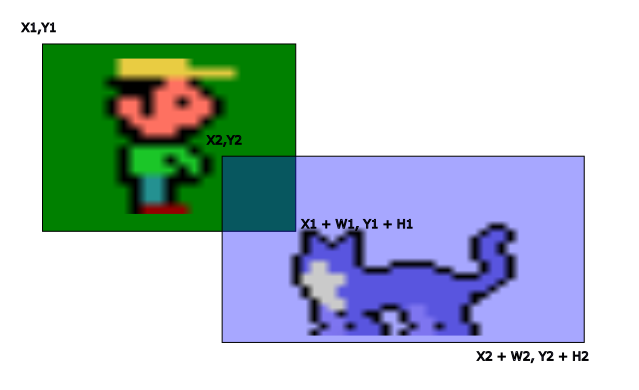
Figure with collision boxes around sprites
To create the imaginary boxes, we use the coordinates (X1, Y1) and (X1 + W1, Y1 + H1) for the first box that encompasses Joe, the protagonist of the game *Bricks*. Here, W1 is the width, and H1 is the height of the box.
If you're not familiar with *Bricks*, you can find it at the link [2] at the end of the article.
Similarly, we do the same for the imaginary box around the character Sam, also from the game *Bricks*, using the coordinates (X2, Y2) and (X2 + W2, Y2 + H2). Again, W2 is the width, and H2 is the height of the box.
Now that we have the boxes defined, we need to determine how to check if these boxes touch or overlap. We do this using the following verification:
First, we check that the X-axis coordinates of the first box do not exceed those of the second box.
X1 + W1 >= X2 AND X1 <= X2 + W2
Then, we check that the Y-axis coordinates of the first box do not exceed those of the second box.
Y1 + H1 >= Y2 AND Y1 <= Y2 + H2
If all four conditions above are met, then we can confirm that the sprites are colliding.
X1 + W1 >= X2 AND X1 <= X2 + W2 AND Y1 + H1 >= Y2 AND Y1 <= Y2 + H2
Let's put it into practice with an example
We will put the theory into practice with a collision example. In this example, as mentioned earlier, we will compare box collisions with hardware-based collisions.
To do this, we will first create a pair of objects that we can move around the screen one using the arrow keys and the other using the A, D, W, and S keys to bring them closer and trigger collisions.
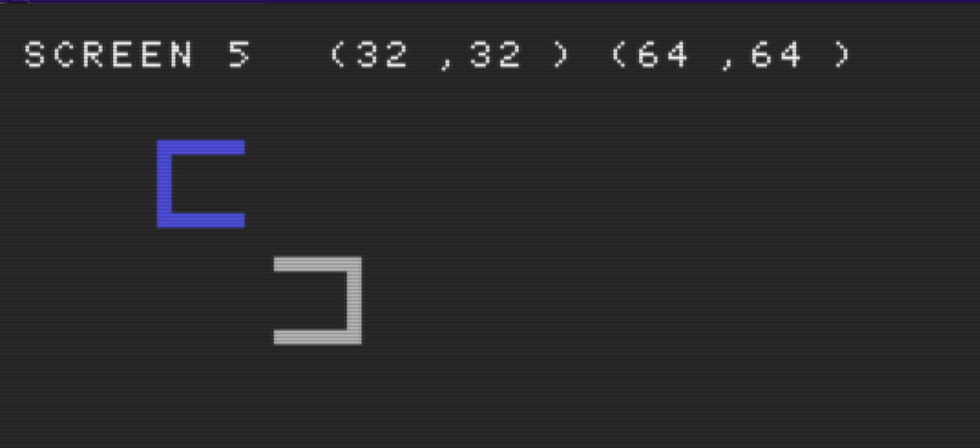
Screenshot of the figures
The objects are intentionally open at one end to demonstrate the difference between the two collision detection approaches presented.
Specifically, we will observe how, with hardware-based collisions, one object can enter another through the open ends without triggering a collision because the collision is detected at the pixel level. However, when one object enters another through the open ends in the box collision method, they will collide because the conditions outlined in the previous section will be met.
Here are the definitions of the objects:
/* --------------------------------------------------------- */
/*  SPRITE square with right opening                         */
/* ========================================================= */

static const unsigned char left_object_pattern_1[] = {
  0b00000000,
  0b00000000,
  0b00111111,
  0b00111111,
  0b00110000,
  0b00110000,
  0b00110000,
  0b00110000
};

static const unsigned char left_object_pattern_2[] = {
  0b00110000,
  0b00110000,
  0b00110000,
  0b00110000,
  0b00111111,
  0b00111111,
  0b00000000,
  0b00000000
};

static const unsigned char left_object_pattern_3[] = {
  0b00000000,
  0b00000000,
  0b11111100,
  0b11111100,
  0b00000000,
  0b00000000,
  0b00000000,
  0b00000000
};

static const unsigned char left_object_pattern_4[] = {
  0b00000000,
  0b00000000,
  0b00000000,
  0b00000000,
  0b11111100,
  0b11111100,
  0b00000000,
  0b00000000
};

/* --------------------------------------------------------- */
/*  SPRITE square with left opening.                         */
/* ========================================================= */

static const unsigned char right_object_pattern_1[] = {
  0b00000000,
  0b00000000,
  0b00111111,
  0b00111111,
  0b00000000,
  0b00000000,
  0b00000000,
  0b00000000
};

static const unsigned char right_object_pattern_2[] = {
  0b00000000,
  0b00000000,
  0b00000000,
  0b00000000,
  0b00111111,
  0b00111111,
  0b00000000,
  0b00000000
};

static const unsigned char right_object_pattern_3[] = {
  0b00000000,
  0b00000000,
  0b11111100,
  0b11111100,
  0b00001100,
  0b00001100,
  0b00001100,
  0b00001100
};

static const unsigned char right_object_pattern_4[] = {
  0b00001100,
  0b00001100,
  0b00001100,
  0b00001100,
  0b11111100,
  0b11111100,
  0b00000000,
  0b00000000
};
To make the example more visual, we decided to incorporate indicators similar to traffic lights. Specifically, one light will turn red when a hardware collision occurs, and another will turn red when a software collision is detected.
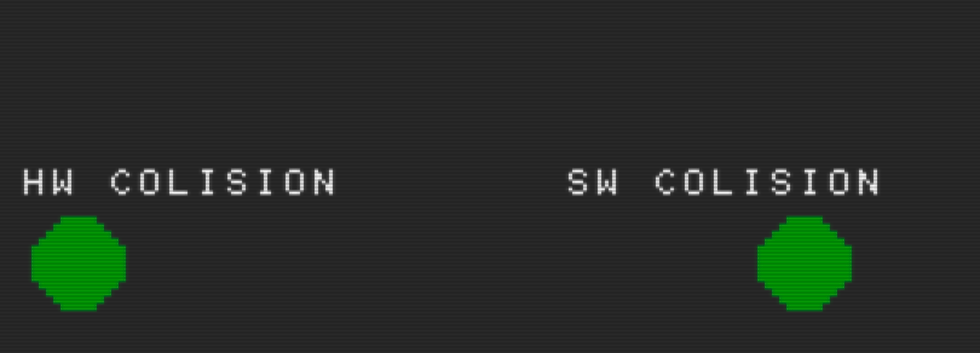
Screenshot of the traffic lights
Here are the definitions of the traffic lights:
/* --------------------------------------------------------- */
/*  SPRITE traffic light                                     */
/* ========================================================= */

static const unsigned char semaphore_pattern_1[] = {
  0b00000000,
  0b00000111,
  0b00001111,
  0b00011111,
  0b00111111,
  0b01111111,
  0b01111111,
  0b01111111
};

static const unsigned char semaphore_pattern_2[] = {
  0b01111111,
  0b01111111,
  0b00111111,
  0b00011111,
  0b00001111,
  0b00000111,
  0b00000000,
  0b00000000
};

static const unsigned char semaphore_pattern_3[] = {
  0b00000000,
  0b11000000,
  0b11100000,
  0b11110000,
  0b11111000,
  0b11111100,
  0b11111100,
  0b11111100
};

static const unsigned char semaphore_pattern_4[] = {
  0b11111100,
  0b11111100,
  0b11111000,
  0b11110000,
  0b11100000,
  0b11000000,
  0b00000000,
  0b00000000
};
Both objects can be moved up, down, left, and right to make them collide.
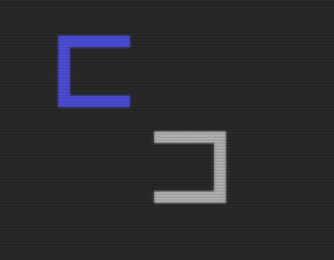
Screenshot of the objects
You can move the blue object using the arrow keys and the gray object using the W (up), S (down), A (left), and D (right) keys.
Here is the code snippet related to the movement of the objects:
// Up
if(stick==1)
{
  ylefobj=(ylefobj-1);
  PutSprite (1,0,xlefobj,ylefobj,1);
}

// w
if(key==119)
{
  yrigobj=(yrigobj-1);
  PutSprite (2,4,xrigobj,yrigobj,1);
}

// Right
if(stick==3)
{
  xlefobj=(xlefobj+1);
  PutSprite (1,0,xlefobj,ylefobj,1);
}

// d
if(key==100)
{
  xrigobj=(xrigobj+1);
  PutSprite (2,4,xrigobj,yrigobj,1);
}

// Down
if(stick==5)
{
  ylefobj=(ylefobj+1);
  PutSprite (1,0,xlefobj,ylefobj,1);
}

// s
if(key==115)
{
  yrigobj=(yrigobj+1);
  PutSprite (2,4,xrigobj,yrigobj,1);
}

// Left
if(stick==7)
{
  xlefobj=(xlefobj-1);
  PutSprite (1,0,xlefobj,ylefobj,1);
}

// a
if(key==97)
{
  xrigobj=(xrigobj-1);
  PutSprite (2,4,xrigobj,yrigobj,1);
}
But let's get to the main point. How did we manage the collision detection in this example?
As mentioned at the beginning, we will use both types of collisions: Hardware and Software.
Here is the code snippet responsible for handling Hardware collisions, which uses the SpriteCollision() function from the vdp_sprites.h library in FUSION-C:
// Hardware collision
if (SpriteCollision()) {
	PutText(230,10,"1",0);
	SC5SpriteColors(3,LineColorsLayer13);
} else {
	PutText(230,10," ",0);
	SC5SpriteColors(3,LineColorsLayer12);
}
Next, here is the code snippet responsible for handling software collisions. In this case, the calculation presented in the theoretical introduction has been simplified.
// Software collision
if ((abs(xlefobj - xrigobj) < 32) && (abs(ylefobj - yrigobj) < 32) ) {
	PutText(230,10,"2",0);
	SC5SpriteColors(4,LineColorsLayer13);
} else {
	PutText(230,10," ",0);
	SC5SpriteColors(4,LineColorsLayer12);
}
Now, let's explain why the calculation was simplified in this particular case.
The initial calculation was as follows:
IF X1+W1>=X2 AND X1<=X2+W2 AND Y1+H1>=Y2 AND Y1<=Y2+H2
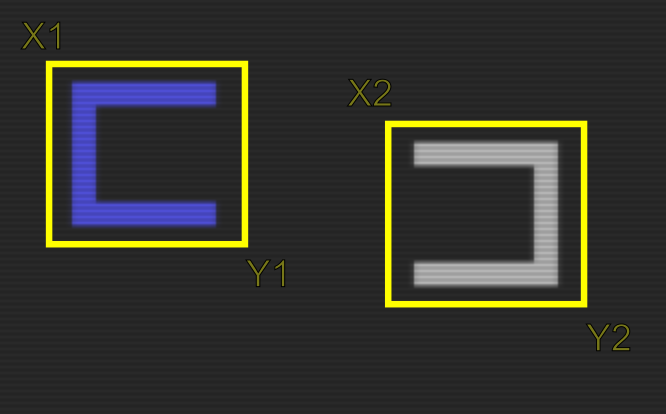
Figure showing the collision boxes of the objects
Since the objects are the same size, we can simplify the calculation by using H for both H1 and H2, and W for both W1 and W2.
Similarly, we can check for vertical overlap by subtracting the X coordinates of the two objects in absolute value, and do the same with the Y coordinates, resulting in the following:
IF ABS(X1-X2)<W AND ABS(Y1-Y2)<H

Figure showing the collision boxes in collision
Let's modify the collisions in the Pong game from the previous article.
Let's revisit the last Pong article to modify the collision management and incorporate the collision box technique.
The code snippet below is from the original article. In that case, we controlled the collisions between the ball and the players' paddles using the SpriteCollision() function from the vdp_sprites.h library in FUSION-C. The function returns a 1 when it detects a collision between sprites.
As we mentioned before, while the MSX systems of that era had the advantage of pixel-level collision detection thanks to the VDP, there are some potential issues. One significant limitation is the inability to determine which sprites have collided. By using the collision box technique, these potential issues and the mentioned limitation are eliminated.
void DrawSprite(void)
{
// Collision Detection
	// Collision with CPU Pad or Player Pad Sptite

	if (SpriteCollision()) {
		if(TheBall.x>235 && DirX>0) {
			DirX*=-1;
		}
		if (TheBall.x<30 && DirX<0) {
			DirX*=-1;
		}
	}
…
}
In the code snippet below, you can see the previous function where we replaced the collision management with the collision box technique. Unlike the introductory example, here we couldn't simplify the calculation because the ball, the players' paddles, and their collision boxes have different dimensions.
We can see that we had to differentiate between the case where the ball collides with the player's paddle (x <= 128) and the case where it collides with the CPU's paddle (x > 128) due to the different sizes and locations of the sprites' collision boxes.
void DrawSprite(void)
{
// Collision Detection
// Collision with CPU Pad or Player Pad Sptite

	// If the ball's x < 128 we will look at the collision with the left paddle
	if ( (TheBall.x <= 128) && (PlyPad.x + 6 >= TheBall.x) && (PlyPad.x <= TheBall.x + 6) && (PlyPad.y + 16 >= TheBall.y) && (PlyPad.y <= TheBall.y + 6) ) {
		DirX*=-1;
	}

	// If the ball's x > 128 we will look at the collision with the right paddle
if ( (TheBall.x > 128) && (TheBall.x + 6 >= CpuPad.x) && (TheBall.x <= CpuPad.x + 16) && (TheBall.y + 6 >= CpuPad.y) && (TheBall.y <= CpuPad.y + 16) ) {
DirX*=-1;
	}
…
}
Conclusions
After reading this article, you now have the basic knowledge to try out the collision box technique in your projects. We suggest that you practice by taking some sprites you've defined yourself and incorporating them into the introductory example. You may need to modify the calculations since the ones we provided have the same size.
Once you've done that, you can apply it to your project and always keep it in mind as a new technique to use.
We hope this has been helpful. See you in the next article.
Click here to see the example in action.
Click here to try the modified version of Pong.
Click here to access the example code.
Click here to access the code for the modified version of Pong.


Comments